
Function-as-a-Service (FaaS) is a serverless computing method that consists on running applications' logic in stateless, ephemeral containers that are triggered by specific events which may last only for one invocation; and are popular implementations of FaaS.
is a serverless computing framework has been getting a lot of traction in the Open Source community. It allows you to easily build your own FaaS serverless computing platform on top of or , while also providing you with the tools necessary for building your functions.
makes it possible to run OpenFaaS without the need for a container orchestration engine by relying on , which makes it ideal for a building a serverless home lab that doesn't require much computing resources; perfect for single board computers like Raspberry Pi.
In this blog post, I am going to describe how you can build your own OpenFaaS serverless platform by installing faasd on a single Raspberry Pi, and how you can build and deploy you first function to OpenFaas.
Installing dependencies
First, ssh into your Raspberry Pi to install a few dependencies:
sudo apt update \
	&& sudo apt install -qy git runc bridge-utils
Install containerd
Since the Rapsberry Pi has an armv7 architecture
pi@raspberrypi:~ $ uname -m
armv7l
we cannot use the released by the containerd maintainers as they are only compatible with the x86_64.
So in order to install containerd, we can either:
- build the binaries on the Raspberry Pi by following the instructions available
OR - use the pre-built binaries that was kind enough to provide in his
Let's start by downloading the containerd binaries
pi@raspberrypi:~ $ curl -sSL https://github.com/alexellis/containerd-armhf/releases/download/v1.3.2/containerd.tgz | sudo tar -xvz --strip-components=2 -C /usr/local/bin/
./bin/containerd-shim-runc-v1
./bin/containerd-stress
./bin/ctr
./bin/containerd
./bin/containerd-shim-runc-v2
./bin/containerd-shim
Get the containerd systemd unit file
pi@raspberrypi:~ $ sudo wget --output-document=/etc/systemd/system/containerd.service https://raw.githubusercontent.com/containerd/containerd/v1.3.2/containerd.service--2020-02-09 16:44:04--  https://raw.githubusercontent.com/containerd/containerd/v1.3.2/containerd.service

2020-02-09 16:44:04 (6.45 MB/s) - ‘/etc/systemd/system/containerd.service’ saved [641/641]
Start containerd and enable it at system startup
pi@raspberrypi:~ $ sudo systemctl enable containerd
Created symlink /etc/systemd/system/multi-user.target.wants/containerd.service → /etc/systemd/system/containerd.service.
pi@raspberrypi:~ $ sudo systemctl start containerd.service
pi@raspberrypi:~ $ systemctl status containerd.service
�? containerd.service - containerd container runtime
   Loaded: loaded (/etc/systemd/system/containerd.service; enabled; vendor preset: enabled)
   Active: active (running) since Sun 2020-02-09 16:45:32 CET; 47s ago
     Docs: https://containerd.io
  Process: 2763 ExecStartPre=/sbin/modprobe overlay (code=exited, status=0/SUCCESS)
 Main PID: 2764 (containerd)
    Tasks: 13
   Memory: 19.2M
   CGroup: /system.slice/containerd.service
           └─2764 /usr/local/bin/containerd
Setup container networking
We need to enable the Linux kernel bridge modules and IPv4 forwarding as follows:
pi@raspberrypi:~ $ sudo modprobe br_netfilter
pi@raspberrypi:~ $ sudo sysctl net.bridge.bridge-nf-call-iptables=1
net.bridge.bridge-nf-call-iptables = 1
pi@raspberrypi:~ $ sudo /sbin/sysctl -w net.ipv4.conf.all.forwarding=1
We also need to install the CNI networking plugins using the commands below:
pi@raspberrypi:~ $ sudo mkdir -p /opt/cni/bin
pi@raspberrypi:~ $ curl -sSL https://github.com/containernetworking/plugins/releases/download/v0.8.5/cni-plugins-linux-arm-v0.8.5.tgz | sudo tar -xz -C /opt/cni/bin
pi@raspberrypi:~ $ ls -l /opt/cni/bin/
total 64436
-rwxr-xr-x 1 root root  3775719 Jan 22 19:52 bandwidth
-rwxr-xr-x 1 root root  4255875 Jan 22 19:52 bridge
-rwxr-xr-x 1 root root 10706922 Jan 22 19:52 dhcp
-rwxr-xr-x 1 root root  5394554 Jan 22 19:52 firewall
-rwxr-xr-x 1 root root  2872015 Jan 22 19:52 flannel
-rwxr-xr-x 1 root root  3843695 Jan 22 19:52 host-device
-rwxr-xr-x 1 root root  3359276 Jan 22 19:52 host-local
-rwxr-xr-x 1 root root  3976434 Jan 22 19:52 ipvlan
-rwxr-xr-x 1 root root  3015277 Jan 22 19:52 loopback
-rwxr-xr-x 1 root root  4046458 Jan 22 19:52 macvlan
-rwxr-xr-x 1 root root  3637166 Jan 22 19:52 portmap
-rwxr-xr-x 1 root root  4187702 Jan 22 19:52 ptp
-rwxr-xr-x 1 root root  3152425 Jan 22 19:52 sbr
-rwxr-xr-x 1 root root  2665626 Jan 22 19:52 static
-rwxr-xr-x 1 root root  3087310 Jan 22 19:52 tuning
-rwxr-xr-x 1 root root  3976306 Jan 22 19:52 vlan
Install faasd
Install faas-cli
Before installing faasd, let's install . faas-cli is the command line utility that can be used to interact with OpenFaaS and allows us to build and deploy functions.
pi@raspberrypi:~ $ curl -sLfS https://cli.openfaas.com | sudo sh
armv7l
Downloading package https://github.com/openfaas/faas-cli/releases/download/0.11.7/faas-cli-armhf as /tmp/faas-cli-armhf
Download complete.

Running with sufficient permissions to attempt to move faas-cli to /usr/local/bin
New version of faas-cli installed to /usr/local/bin
Creating alias 'faas' for 'faas-cli'.
  ___                   _____           ____
 / _ \ _ __   ___ _ __ |  ___|_ _  __ _/ ___|
| | | | '_ \ / _ \ '_ \| |_ / _` |/ _` \___ \
| |_| | |_) |  __/ | | |  _| (_| | (_| |___) |
 \___/| .__/ \___|_| |_|_|  \__,_|\__,_|____/
      |_|

CLI:
 commit:  30b7cec9634c708679cf5b4d2884cf597b431401
 version: 0.11.7
You can also enable bash-completion for faas-cli using the command below:
pi@raspberrypi:~ $ source <(faas-cli completion --shell bash)Install faasd
Let's fetch the latest faasd binary using the following command
pi@raspberrypi:~ $ sudo wget --output-document=/usr/local/bin/faasd https://github.com/openfaas/faasd/releases/download/0.7.4/faasd-armhf && sudo chmod +x /usr/local/bin/faasd

2020-02-09 17:10:19 (662 KB/s) - ‘/usr/local/bin/faasd’ saved [14548992/14548992]

pi@raspberrypi:~ $ faasd version
  __                     _
 / _| __ _  __ _ ___  __| |
| |_ / _` |/ _` / __|/ _` |
|  _| (_| | (_| \__ \ (_| |
|_|  \__,_|\__,_|___/\__,_|

faasd
Commit: 592f3d3cc073ca6af83fac3013cc2f4743d05e52
Version: 0.7.4
Now we just need to run the faasd installation:
pi@raspberrypi:~ $ export GOPATH=$HOME/go/
pi@raspberrypi:~ $ mkdir -p $GOPATH/src/github.com/openfaas
pi@raspberrypi:~ $ cd $GOPATH/src/github.com/openfaas
pi@raspberrypi:~/go/src/github.com/openfaas $ git clone https://github.com/openfaas/faasd.git
pi@raspberrypi:~/go/src/github.com/openfaas $ cd faasd/
pi@raspberrypi:~/go/src/github.com/openfaas/faasd $ sudo faasd install
Login with:
  sudo cat /var/lib/faasd/secrets/basic-auth-password | faas-cli login -s
And finally, as mentioned in the command output, login using faas-cli to be able to interact with your new OpenFaaS installation:
pi@raspberrypi:~ $ sudo cat /var/lib/faasd/secrets/basic-auth-password | faas-cli login -s
Calling the OpenFaaS server to validate the credentials...
WARNING! Communication is not secure, please consider using HTTPS. Letsencrypt.org offers free SSL/TLS certificates.
credentials saved for admin http://127.0.0.1:8080
Access the OpenFaaS interface
Once faasd is setup and running, the OpenFaaS user interface can be accessed on your browser at http://RASPBERRYPI_IP:8080. Since it is protected by basic auth, you would need to use the username and password available under /var/lib/faasd/secrets/basic-auth-password and /var/lib/faasd/secrets/basic-auth-user to login.
Once logged in, you will be greeted with the following interface:
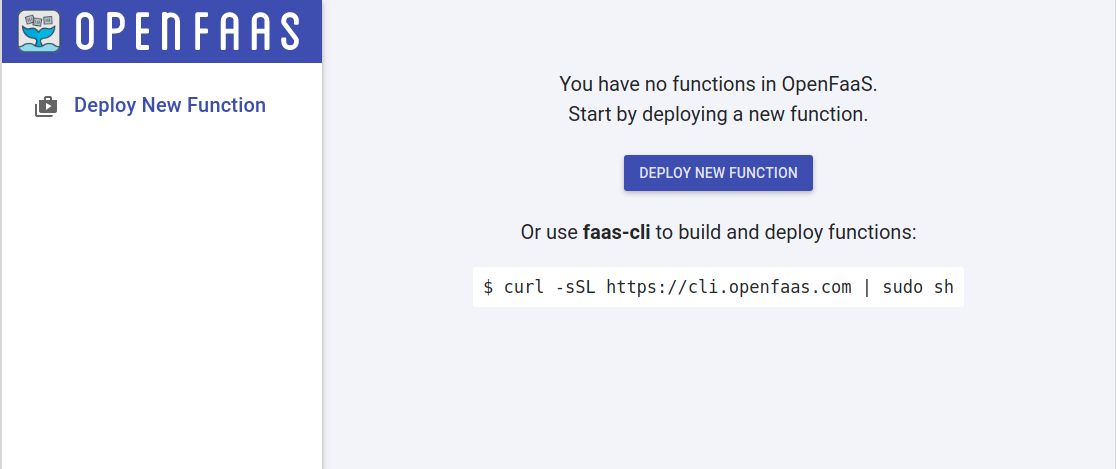
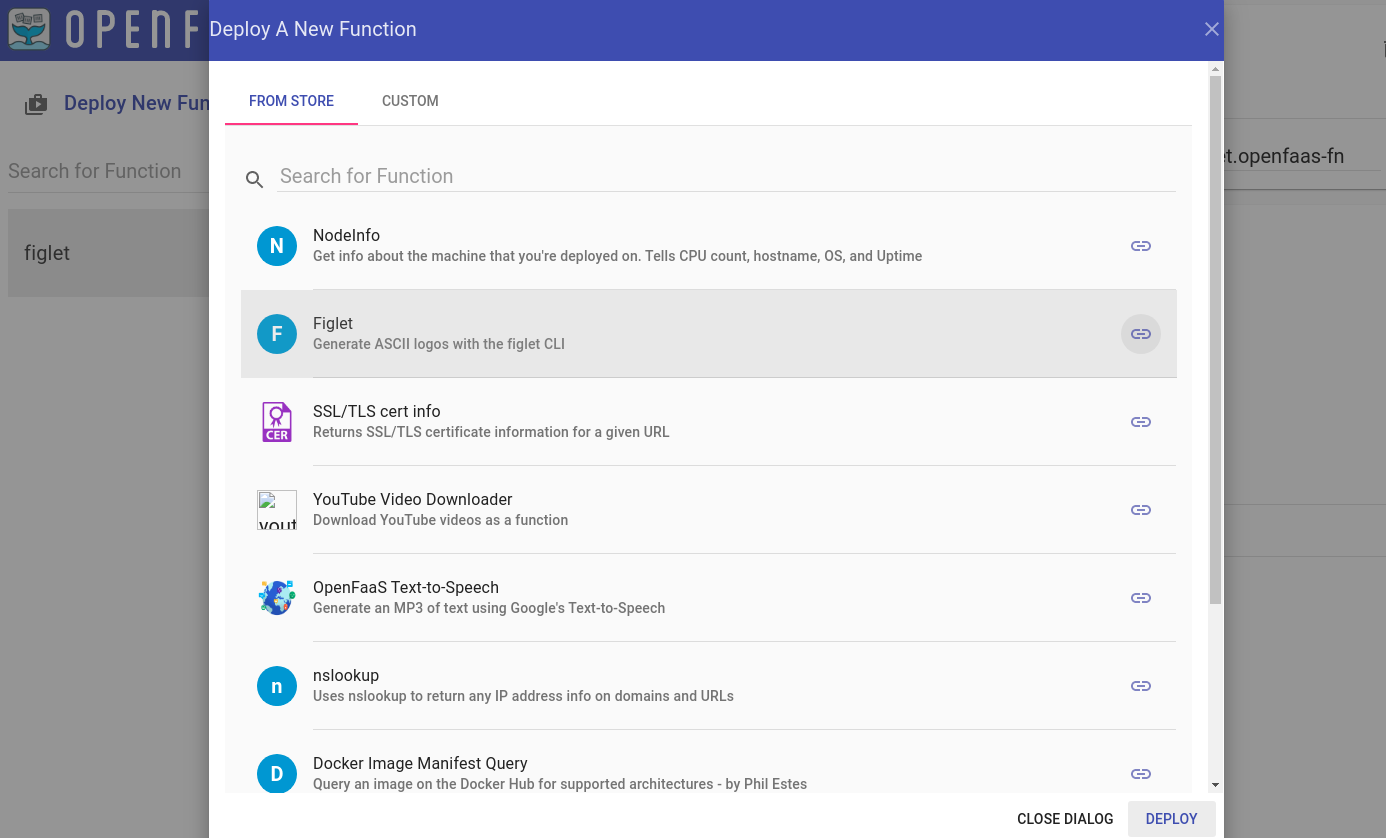
There are a few functions already available at the OpenFaas store, that you can easily deploy directly from the web user interface. Let's try deploying the figlet function:
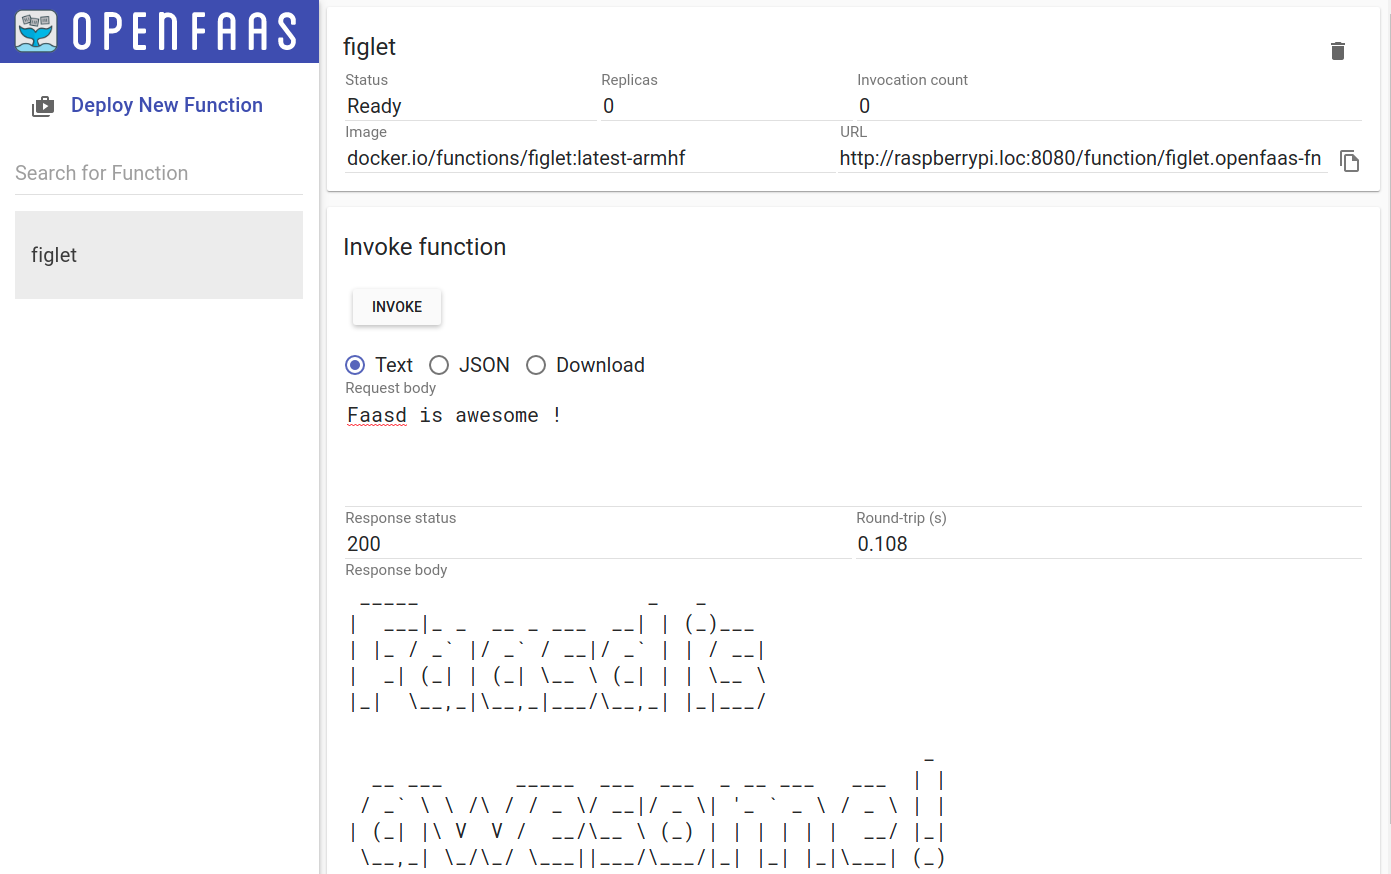
Once the status of the function is Ready, let's try to invoke it:
Using faas-cli
Let's use faas-cli now to interact with the OpenFaas gateway. First, we need to login to the OpenFaas gateway using the faas login command from our workstation.
Fetch the password from the /var/lib/faasd/secrets/basic-auth-password file on the Raspberry Pi and store it in a file on your workstation because it's required for the login. Here, I have stored the password in the ~/.faas_pass file:
$ cat ~/.faas_pass | faas login -s --gateway http://raspberrypi.loc:8080
Calling the OpenFaaS server to validate the credentials...
WARNING! Communication is not secure, please consider using HTTPS. Letsencrypt.org offers free SSL/TLS certificates.
credentials saved for admin http://raspberrypi.loc:8080
We can list and inspect the deployed functions using the commands below:
$ faas list --gateway http://raspberrypi.loc:8080
Function                      	Invocations    	Replicas
figlet                        	1              	1

$ faas describe --gateway http://raspberrypi.loc:8080 figlet
Name:                figlet
Status:              Ready
Replicas:            1
Available replicas:  1
Invocations:         1
Image:
Function process:
URL:                 http://raspberrypi.loc:8080/function/figlet
Async URL:           http://raspberrypi.loc:8080/async-function/figlet
Using faas-cli to deploy a function from the store
We can list the available function in the OpenFaas store for the armhf platform using the command below:
$ faas store list --platform armhf

FUNCTION                    DESCRIPTION
NodeInfo                    Get info about the machine that you...
Figlet                      Generate ASCII logos with the figlet CLI
SSL/TLS cert info           Returns SSL/TLS certificate informati...
YouTube Video Downloader    Download YouTube videos as a function
OpenFaaS Text-to-Speech     Generate an MP3 of text using Google'...
nslookup                    Uses nslookup to return any IP addres...
Docker Image Manifest Query Query an image on the Docker Hub for ...
Left-Pad                    left-pad on OpenFaaS
Identicon Generator         Create an identicon from a provided s...
Let's deploy the nslookup function using the faas store deploy command:
$ faas store deploy --platform armhf --gateway http://raspberrypi.loc:8080 nslookup
WARNING! Communication is not secure, please consider using HTTPS. Letsencrypt.org offers free SSL/TLS certificates.

Deployed. 200 OK.
URL: http://raspberrypi.loc:8080/function/nslookup

$ faas describe nslookup --gateway http://raspberrypi.loc:8080
Name:                nslookup
Status:              Ready
Replicas:            1
Available replicas:  1
Invocations:         0
Image:
Function process:
URL:                 http://raspberrypi.loc:8080/function/nslookup
Async URL:           http://raspberrypi.loc:8080/async-function/nslookup
Let's invoke our new function from the command line:
$ echo "openfaas.com" | faas invoke nslookup --gateway http://raspberrypi.loc:8080
nslookup: can't resolve '(null)': Name does not resolve

Name:      openfaas.com
Address 1: 185.199.108.153
Address 2: 185.199.111.153
Address 3: 185.199.109.153
Address 4: 185.199.110.153
Voila! We have deployed and tested our first function from the command line. 🎉
Build your own function
What if we want to build a new function ourserlves, and deploy it to OpenFaas on the Raspberry PI?faas-cli offers a convenient way to achieve this, as it provides templates for multiple programming languages and commands that allow us to and deploy new functions to OpenFaas.
However, since we don't have Docker installed on the Rapsberry Pi, we would need to build our functions using another tool: .
Download buildkit binaries
Since buildkit binaries for armv7 are already available on the project's Github repository, we won't need to compile them by ourselves. Let's fetch the latest buildkit binaries on the RPi:
pi@raspberrypi:~ $ wget -qO- https://github.com/moby/buildkit/releases/download/v0.6.4/buildkit-v0.6.4.linux-arm-v7.tar.gz | sudo tar -xz -C /usr/local/bin/ --strip-components=1
pi@raspberrypi:~ $ /usr/local/bin/buildkitd --version
buildkitd github.com/moby/buildkit v0.6.4 ebcef1f69af0bbca077efa9a960a481e579a0e89
pi@raspberrypi:~ $ /usr/local/bin/buildctl --version
buildctl github.com/moby/buildkit v0.6.4 ebcef1f69af0bbca077efa9a960a481e579a0e89
Build a new function
We are going to build a small function in golang and deploy it to OpenFaas.
Luckily, we don't have to do everything from scratch. We can use one of the already available templates from the OpenFaas template store.
We can list the templates available for the armhf platform using the command below:
pi@raspberrypi:~ $ faas template store list --platform armhf

NAME                    SOURCE             DESCRIPTION
dockerfile-armhf        openfaas           Classic Dockerfile armhf template
go-armhf                openfaas           Classic Golang armhf template
node-armhf              openfaas           Classic NodeJS 8 armhf template
python-armhf            openfaas           Classic Python 2.7 armhf template
python3-armhf           openfaas           Classic Python 3.6 armhf template
node10-express-armhf    openfaas-incubator Node.js 10 powered by express armhf template
python3-flask-armhf     openfaas-incubator Python 3.6 Flask armhf template
python3-http-armhf      openfaas-incubator Python 3.6 with Flask and HTTP for ARMHF
node8-express-armhf     openfaas-incubator Node.js 8 powered by express armhf template
golang-http-armhf       openfaas-incubator Golang HTTP armhf template
golang-middleware-armhf openfaas-incubator Golang Middleware armhf template
We're going to use the classic golang template here, so let's create a new function:
pi@raspberrypi:~ $ mkdir ~/openfaas && cd ~/openfaas
pi@raspberrypi:~/openfaas $ faas new hello-go --lang go-armhf --prefix myedes
Folder: hello-go created.
  ___                   _____           ____
 / _ \ _ __   ___ _ __ |  ___|_ _  __ _/ ___|
| | | | '_ \ / _ \ '_ \| |_ / _` |/ _` \___ \
| |_| | |_) |  __/ | | |  _| (_| | (_| |___) |
 \___/| .__/ \___|_| |_|_|  \__,_|\__,_|____/
      |_|


Function created in folder: hello-go
Stack file written: hello-go.yml

Notes:
You have created a new function which uses Golang 1.11
To include third-party dependencies, use a vendoring tool like dep:
dep documentation: https://github.com/golang/dep#installation

You may also like the golang-middleware and golang-http templates
available via "faas-cli template store"
The --prefix option allows you to specify a custom docker registry used to pushing and pulling the function's image.
The template we have used consists of a simple go function that returns a text message along with the request body. The logic can be found inside the hello-go/handler.go file:
pi@raspberrypi:~/openfaas $ cat hello-go/handler.go
package function

import (
	"fmt"
)

// Handle a serverless request
func Handle(req []byte) string {
	return fmt.Sprintf("Hello, Go. You said: %s", string(req))
}
Using the --shrinkwrap option, we can generate the build context for our function without actually building our function's image. This is useful when we want to use a different tool for building our image, in our case buildkit:
pi@raspberrypi:~/openfaas $ faas build -f hello-go.yml --shrinkwrap
[0] > Building hello-go.
Clearing temporary build folder: ./build/hello-go/
Preparing: ./hello-go/ build/hello-go/function
Building: docker.io/myedes/hello-go:latest with go-armhf template. Please wait..
hello-go shrink-wrapped to ./build/hello-go/
[0] < Building hello-go done in 0.01s.
[0] Worker done.

Total build time: 0.01s
As we can see, the command generated a few files inside the build/ folder; our build context:
build/
└── hello-go
    ├── Dockerfile
    ├── function
    │   └── handler.go
    ├── go.mod
    ├── main.go
    └── template.yml

2 directories, 5 files
Before building our image, we need to configure the authentication to be able to push to the docker registry. However, we cannot use the docker login command since we don't have Docker installed, so we will have to create the ~/.docker/config.json file manually.
For , we need to generate a token from the user interface and then create the ~/.docker/config.json on the RPi as follows:
pi@raspberrypi:~/openfaas $ export DOCKERHUB_USERNAME=myedes
pi@raspberrypi:~/openfaas $ export DOCKERHUB_TOKEN=<PERSONAL ACCESS TOKEN>
pi@raspberrypi:~/openfaas $ export DOCKER_AUTH=$(echo -n "$DOCKERHUB_USERNAME:$DOCKERHUB_TOKEN" | base64)

pi@raspberrypi:~/openfaas $ cat > ~/.docker/config.json << EOF
{
    "auths": {
        "https://index.docker.io/v1/": {
            "auth": "$DOCKER_AUTH"
 		}
 	}
}
EOF
Let's start the buildkitd daemon in the background, and then start the build:
# Run the buildkitd daemon
pi@raspberrypi:~/openfaas $ sudo /usr/local/bin/buildkitd &
[1] 15587

# Build and push the function image to hub.docker.com
pi@raspberrypi:~/openfaas $ sudo buildctl build \
	--frontend dockerfile.v0 \
    --local context=build/hello-go/ \
    --local dockerfile=build/hello-go/ \
    --output type=image,name=docker.io/myedes/hello-go:latest,push=true

[+] Building 81.3s (26/26) FINISHED
...
 => => pushing layers
 => => pushing manifest for docker.io/myedes/hello-go:latest
For more information about how to use buildkit, make sure to check out the Github repository.Deploy the function
As we have built and pushed the function's image to the registry, we can now go ahead and deploy our new function to our OpenFaas gateway:
pi@raspberrypi:~/openfaas $ faas deploy -f hello-go.yml
Deploying: hello-go.
WARNING! Communication is not secure, please consider using HTTPS. Letsencrypt.org offers free SSL/TLS certificates.

Deployed. 200 OK.
URL: http://127.0.0.1:8080/function/hello-go
By inspecting our new function, we can see that it's in a "Ready" state:
pi@raspberrypi:~/openfaas $ faas describe hello-go
Name:                hello-go
Status:              Ready
Replicas:            1
Available replicas:  1
Invocations:         0
Image:
Function process:
URL:                 http://127.0.0.1:8080/function/hello-go
Async URL:           http://127.0.0.1:8080/async-function/hello-go
We can now invoke it using the faas invoke command from the Raspberry Pi:
pi@raspberrypi:~/openfaas $ echo "Hello OpenFaas" | faas invoke hello-go
Hello, Go. You said: Hello OpenFaas
or from our workstation, but we need to specify the gateway using the --gateway parameter:
$ echo "Hello from laptop" | faas invoke --gateway http://raspberrypi.loc:8080 hello-go

Hello, Go. You said: Hello from laptop
And that's it, we have built and deployed our first function to OpenFaas running on a single Raspberry PI 🎉 Pretty cool isn't it?
Conclusion
In this blog post, we have gone through how we can run a FaaS serverless platform based on OpenFaas on a Raspberry Pi board, and how to build and deploy a simple function.
Although faasd is still a bit limited in its features compared to OpenFaas, it is very useful for small setups like home labs especially that there is no need to maintain a Kubernetes or Docker Swarm cluster
Finally, kudos to and the OpenFaas team for this awesome project!